The World's Easiest Sourdough Bread
Sourdough has a reputation for being complicated. The starter, the hydration, the folding schedules, the precise temperatures – it can feel like you need a degree in microbiology before you're allowed near a banneton. Sune Truslev of Food Geek disagrees, and so do I. This is easy sourdough bread, and it actually works.
This recipe is adapted from Sune's method, and it's the one that finally made sourdough approachable for me. Sune has genuinely mastered the craft of sourdough bread — his approach is methodical, well-explained, and stripped of unnecessary complexity. If you want to go deeper into the science and technique, his YouTube channel is worth every minute. What follows is my version of his easy sourdough bread, baked at Casa Adora with organic strong white flour and bottled water, in two Le Creuset Dutch ovens running simultaneously.
This easy sourdough bread recipe makes two loaves. The process runs over two days — an evening mix, an overnight rise, a morning shape, and an afternoon bake. Most of that time, the dough is doing the work without you.
Before you start — the sourdough starter
You'll need an active sourdough starter at 100% hydration — equal weights of flour and water. Feed it in the morning of day one so it's ripe and ready to use by the evening.
To feed the starter: take 50g of unfed starter, add 100g of bread flour and 100g of water, mix well, and leave at room temperature. By early evening it should be bubbly and active and smell pleasantly sour. You'll use 100g of this for the recipe and keep the rest going for next time.
Ingredients for easy sourdough bread
(makes 2 loaves)
- 760g strong white bread flour
- 190g whole-grain wheat flour
- 700g water
- 100g ripe sourdough starter (100% hydration)
- 22g fine salt
Method
Day 1 — Evening (around 9pm)
1. Mix the dough Put the 100g of starter and 700g of water into a large bowl. Mix until the starter is dissolved. Add both flours and the salt. Mix thoroughly with your hands or a stand mixer until well combined — you're not kneading here, just bringing it together. Cover with a damp cloth and leave overnight at room temperature.
The recipe assumes a kitchen temperature of around 21°C. Warmer and the dough may be ready sooner; cooler and it will take longer. By morning it should have roughly doubled in size and jiggle slightly when you shake the bowl.
Day 2 — Morning (between 6am and 10am)
2. Divide and pre-shape Pour the dough onto an unfloured surface and divide it into two equal pieces using a dough scraper.
Take one piece and work it into a rough ball — fold the dough over itself from each direction to build tension, then use the scraper to drag it towards you across the surface, tucking the dough underneath as you go. Repeat until you have a reasonably tight ball. Repeat with the second piece.
Leave both dough balls to rest uncovered on the surface for 15–20 minutes.
3. Shape and refrigerate Prepare your bannetons — mist lightly and dust with rice flour.
Shape each dough ball again, this time more deliberately, ensuring the surface is tight and smooth. Flip each one into a banneton using your scraper, seal it in a plastic bag, and transfer it to the fridge. Leave it in the fridge for several hours — the cold retard slows fermentation and develops flavour.
Day 2 — Afternoon
4. Preheat Place both Dutch ovens in the oven and heat to 260°C for at least one hour. You want them properly, thoroughly hot.
5. Bake Cut two pieces of baking parchment large enough to cover the bannetons — make them generous so you can use them as a sling to lower the dough into the pot.
Take one banneton from the fridge. Place the parchment over the top, put a flat board or peel on top of that, and flip it over. Lift the banneton off carefully. Score the dough with a lame or very sharp knife.
Open the oven and lower the dough — parchment and all — into the Dutch oven. Put the lid on and bake for 20 minutes.
Remove the lid, lower the temperature to 230°C, and bake for a further 25–30 minutes until the crust is deep, dark, and crunchy. Don't be alarmed if the edges catch slightly — that's where the flavour is.
Transfer to a wire rack. Turn the oven back up to 260°C and repeat with the second loaf.
6. Cool Leave both loaves to cool completely before cutting. This is important — the crumb is still setting as the bread cools, and cutting too early gives a gummy interior.
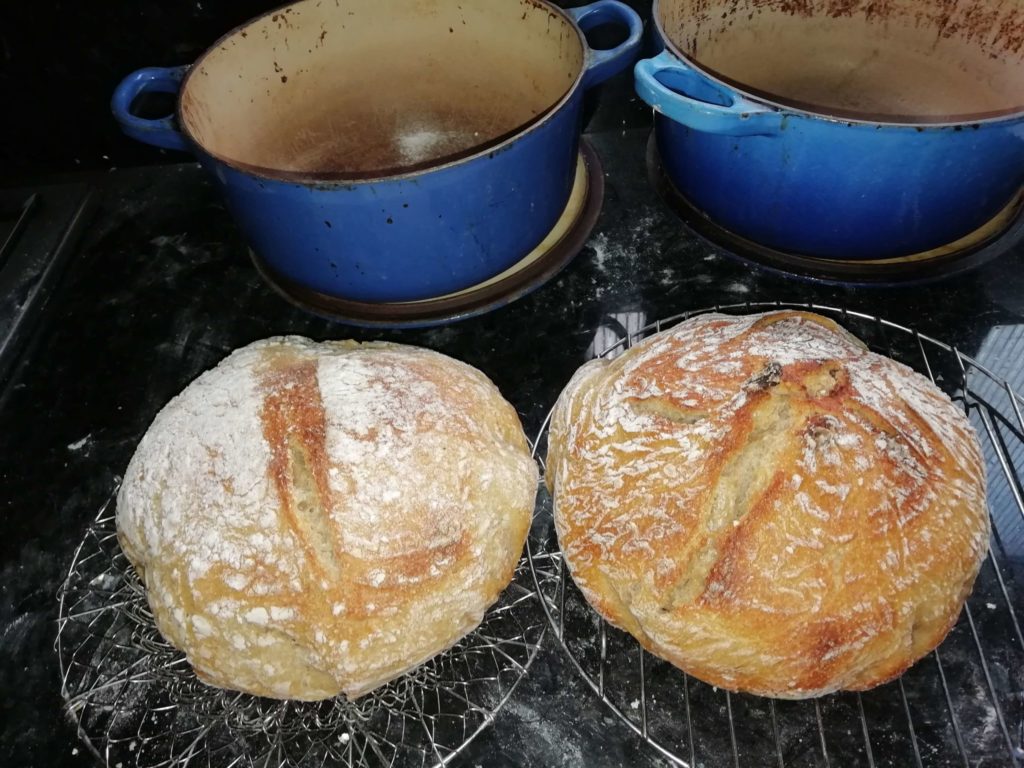
Two sourdough loaves fresh from the Dutch oven — Casa Adora
A few notes
The overnight bulk fermentation is the heart of this easy sourdough bread method — it's what makes it achievable without a schedule. There's no folding schedule, no fussing. Mix it in the evening, leave it alone, and the dough does what dough does.
Bottled water makes a difference if your tap water is heavily chlorinated — chlorine can inhibit fermentation. It's a small thing, but worth knowing.
If you only have one Dutch oven, bake the loaves sequentially rather than simultaneously. The second loaf will be fine in the fridge while the first bakes.
Got a loaf that's gone a bit tired? My Posh Fried Bread: Sourdough, Tomato & Garlic is one of the best ways to use it up.
This easy sourdough bread recipe is part of my Bread Recipes Hub — a complete collection of loaves, flatbreads and soda breads from Casa Adora and beyond. It also features in my Gut Health Recipes collection — real food from a rural Andalucían kitchen, built around fermented foods, high-fibre pulses, wholegrains and prebiotic-rich ingredients.
This sourdough is also a resistant starch recipe — cook it, cool it, use again.
Find more recipes and food adventures here.
Wonky photos, proper bread, genuine adventures — The Flexible Chef